Installing Node.js on a ULTRA Cloud server

ULTRA Cloud Panel makes it straightforward to install Node.js on your managed server without needing shell access. This guide walks through choosing the application type and selecting the version of Node.js you want to run.
Before you begin
You will need:
- Access to the ULTRA Cloud Panel for the server hosting your site.
- The site or subdomain you want Node.js installed against (for example
example.comorapp.example.com). - The Node.js major version your application requires (for example 16, 18 or 20). If you are not sure, check your application’s
package.jsonenginesfield or the project’s documentation.
Step 1: Open the site’s Application settings in Scout
In the ULTRA Cloud Panel, navigate to the site you want to configure and open its Application settings. By default, sites are set to a standard web application type such as WordPress. To run a Node.js application you will change this to Node.js.
Step 2: Select Node.js from the application drop-down
From the Application drop-down menu, choose Node.js. Scout supports a range of modern application types in this menu, including Node.js and Next.js, which streamline the installation process.

Step 3: Choose the Node.js version
After selecting Node.js, you will be prompted to choose the version. Pick the major version your application supports. Common choices include Node.js 16, 18 and 20. If your application only supports an older release, install that version; you can upgrade later by repeating these steps.
Step 4: Save and wait for the install to complete
Save the application settings. Scout will install the selected Node.js version on the server and configure the site to use it. The installation typically takes only a few minutes.
Verifying the installation
Once the install has finished, you can verify Node.js is available by SSHing in to the server as your site user and running:
node -v
npm -v
Both commands should report a version number matching the release you selected.
Changing the Node.js version later
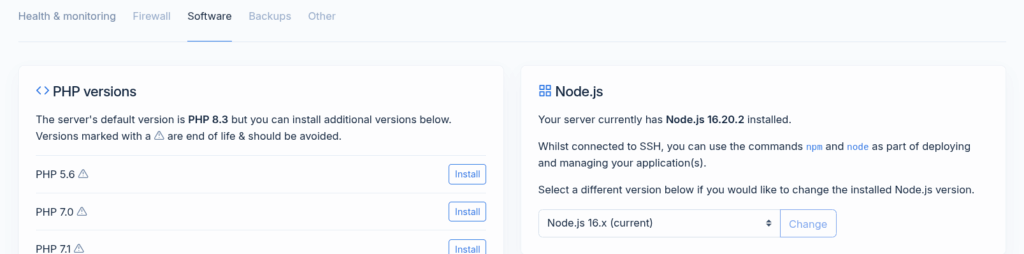
To switch to a different Node.js version, navigate to Server > Settings > Software. It is also possible to install Node.js from here.
Need a different application type?
If your application is not Node.js but still needs a custom runtime, for example a Docker container… See our companion guide on installing Docker via the command line and proxying a Scout site to a container.