How to Issue a Free SSL Certificate in cPanel (New Method)
Having a secure website isn’t just a nice-to-have anymore—it’s a must! A free SSL certificate ensures your visitors’ data stays safe, builds trust, and keeps Google happy.
If you’ve looked for the old “AutoSSL or SSL/TLS Status” button recently and noticed it’s missing, don’t worry! cPanel updated its look. Issuing your free SSL is now done directly through the SSL/TLS Certificates interface.
Follow this quick guide to get your site secured in under two minutes.
Step 1: Navigate to SSL/TLS Certificates
- Log in to your cPanel dashboard.
- Scroll down to the Security section.
- Click on SSL/TLS Certificates (instead of the old SSL/TLS Status icon).
Step 2: Choose Your Domains
Once you are on the screen shown below, look for the Issue a certificate section at the bottom.
- Under “Add the domains that you want to secure…”, you will see a list of your website domains (like
yourdomain.com,*.yourdomain.com, etc.). - Check the boxes next to the specific domains you want to secure.
Step 3: Issue and Install
- Once your domains are selected, look for the Issue or Install button right below the list.
- Click it, and let cPanel do its magic!
The system will automatically generate your free Let’s Encrypt / AutoSSL certificate and apply it to your site.
Verifying Your SSL Certificate
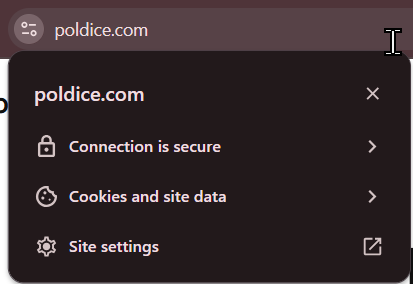
Give it a minute or two to process, then open a new browser window and visit your website. Look for the little padlock or “Tune” icon next to your URL in the address bar. If you see it, you’re officially secure.
Still seeing a “Not Secure” warning? Sometimes your browser holds onto an old version of your site. Try clearing your browser cache or opening your site in an Incognito/Private window.
If you are running into any issues or have any further questions or concerns, please don’t hesitate to get in touch.